
There are four types of email addresses in eComFax: Primary address, Contact address, Delivery account & Additional email accounts.
Primary Address
- First email address in the delivery section with grey background. Usually this the first is the email customer uses to log in to the Comcast Business marketplace (https://cloudsolutions.comcast.com/home) and cannot be modified by user.
- This address also Allows send outgoing faxes.
In order to change the Primary Address, please contact CWS at helpdesk@ecomfax.com and provide both addresses, the old and the new Primary Address.
Contact Address
- Used when eComFax reports to the customer when they are running out of credits.
- This address can be changed by the customer.
To change the Contact Addresss from the customer dashboard, go to Configuration > Subscription > and under Email* enter the new email address and click on Save (see below under Figure 1 ).
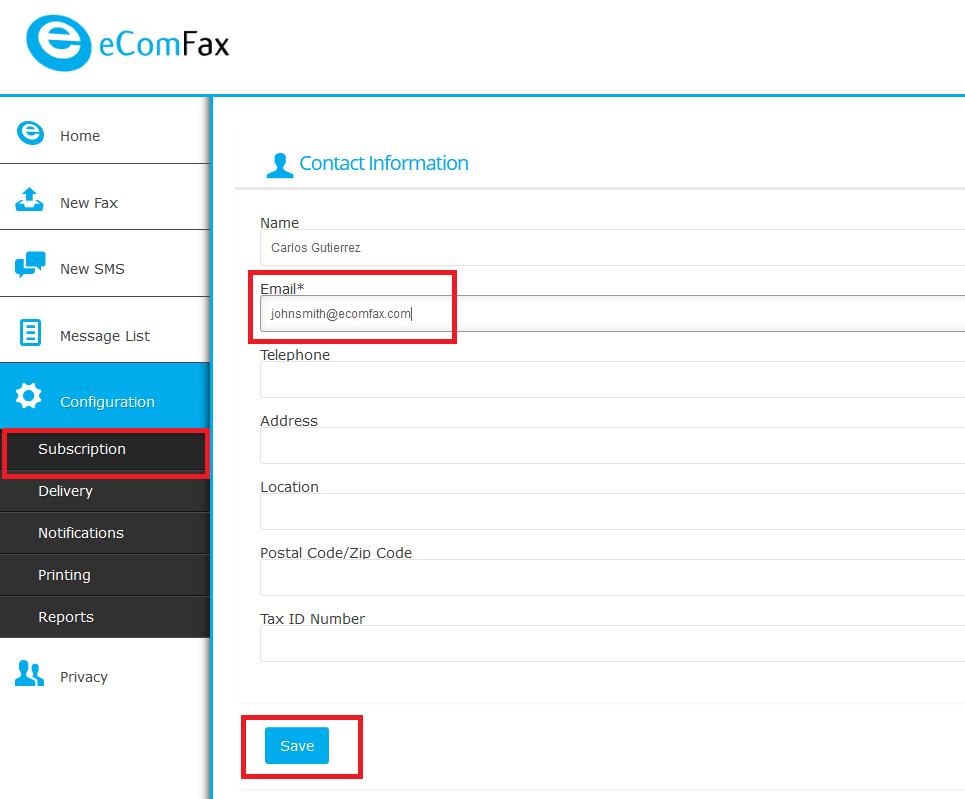
Figure 1. Changing Contact Address
Delivery Address
- eComFax routes the incoming faxes to this address.
- It can also be used to send outgoing faxes.
To change the Delivery Address from the customer dashboard, go to Home and click on Edit at the bottom of the Fax Number Section, as shown in Figure 2. On a new pop-up window/form, enter the new email address under the Delivery Email field.
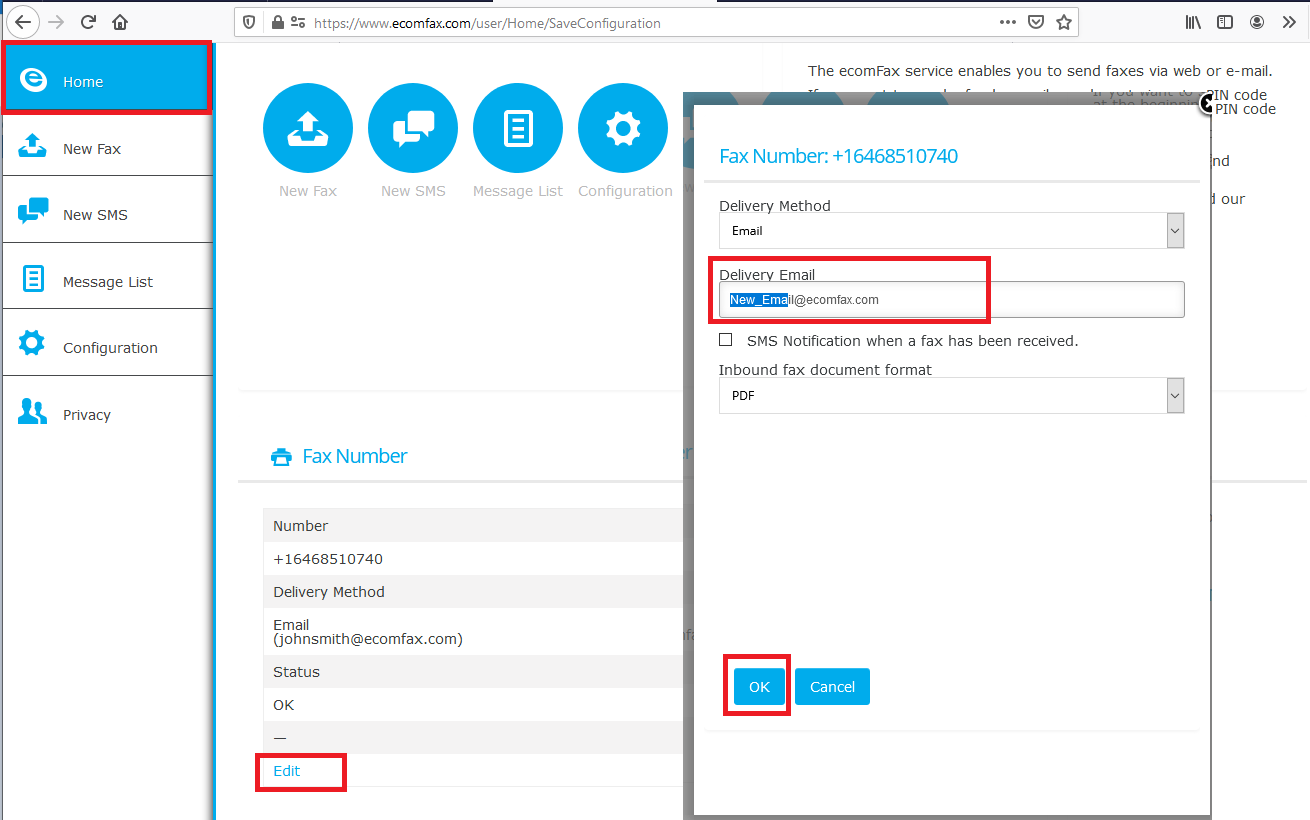
Figure 2. Delivery Address
Additional Addresses
- Up to 3 additional addresses can be configured inside eComFax SOHO & SMB editions.
- eComFax uses these addresses to send all the incoming faxes.
- This can also be used as a valid email address to send outgoing faxes.
- Delivery Addresses and Additional addresses receive all incoming faxes and notifications.
To change the Additional Address from the customer dashboard, go to Configuration > Delivery and click on the Address checkbox and press the minus button (to delete) or the plus button (to add a new additional address). See below under Figure 3.
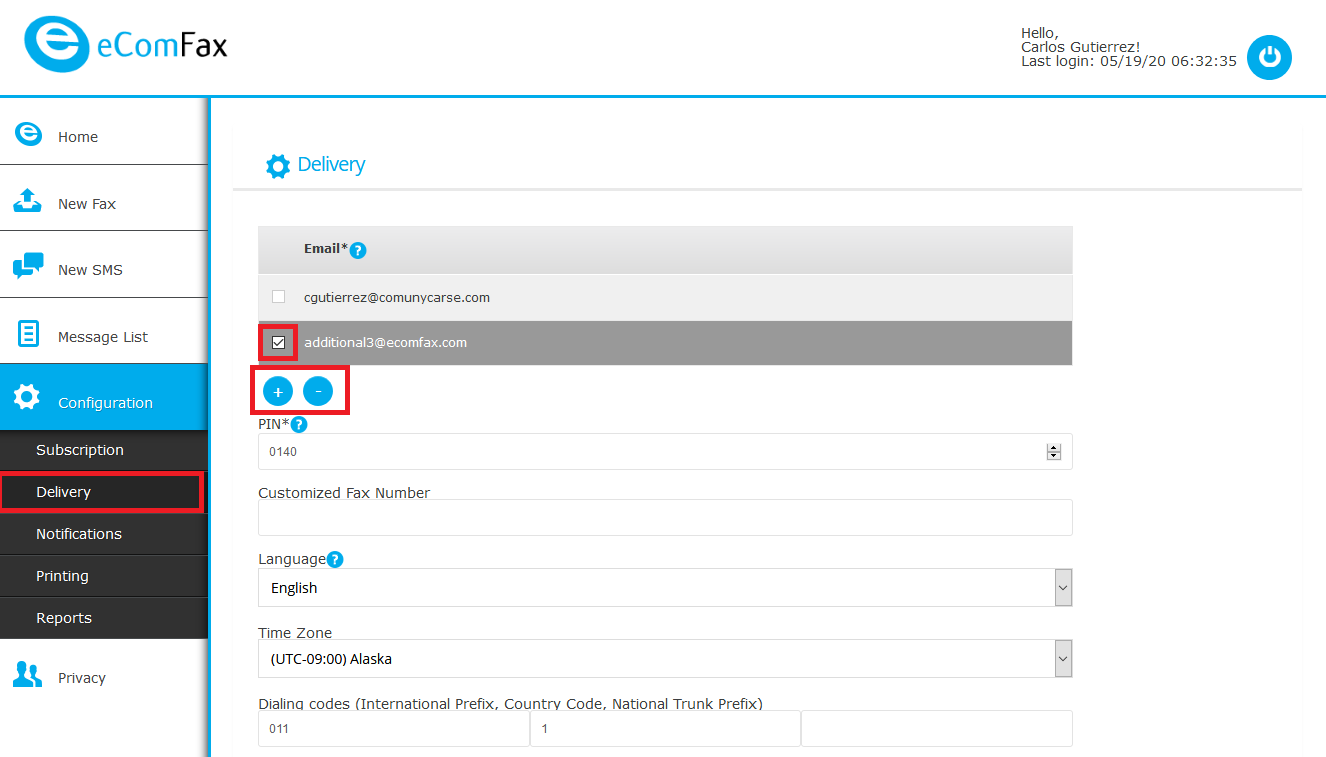
Figure 3. Changing Additional Address